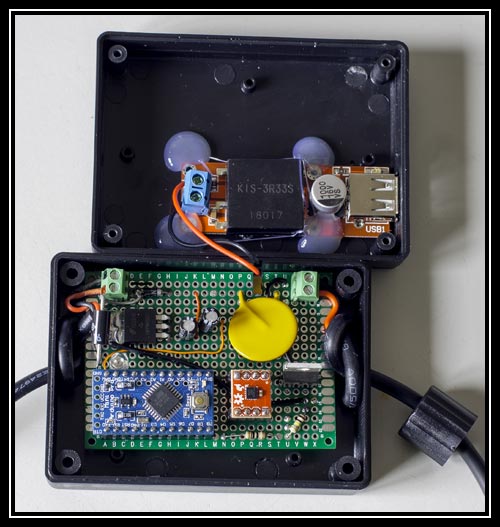
Second english post to document my Arduino + ADXL362 Motion activated 12V switch.
 My car powers the cigarette lighter even when the keys are removed, Which – very slowly – drained the batteries when gadgets where left connected to it. One option would be to open the dashboard to connect a second outlet to the right cable on the car radio, but that would be too easy.The basic Idea was to use an ADXL362 accelerometer to know if the vehicle was moving in the last 10 minutes or turn the output off. I first wanted to use the ADXL362’s internal motion activation mechanism, but failed to get the result I wanted, so I resorted to a purely software alternative ruining on the Arduino Pro Mini. For this I forked the effort of driving the accelerometer started by Anne Mahaffrey to my own, freshly created GitHub repository. Finally glue everything together with a small arduino sketch : ADXL362_Acc_LED_2_1.zip.
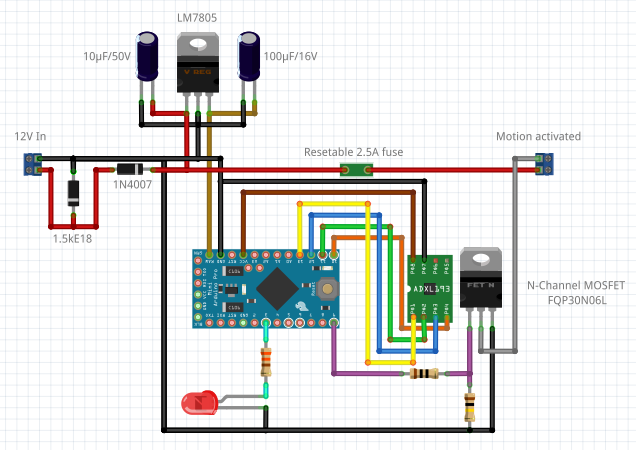
Here is a schema from the circuit (done in Fritzing) :
 Schema file in Fritzing format : ShakeMotion_2.fzz (the ADXL is not the right one)
and here is my Bill Of Material :
- Arduino Pro Mini 3.3V/8MHz
- Sparkfun ADXL362 breakout board (SKU SEN-11446)
- LM7805 voltage regulator
- FQP30N06L N-Channel MOSFET
- 1N4007 diode
- 1.5kE18 transient-voltage-suppression bidirectional diode (thanks to the sparkfun forum for telling me about those)
- 2500 mA resettable fuse
- 10µF/50V electrolytic capacitor
- 100µF/16V electrolytic capacitor
- Red LED
- 330 Ω resistor
- 10 Ω resistor
- 100K Ω resistor
I just added a 12V-to-USB power board to directly feed an USB powered gadget to the back side of the box, and it’s finished.
There is much room for improvement : use low power modes on the Arduino, use the built-in motion sensor mode of the ADXL362, use a less power-hungry solution than a LM7805, tailor all my protection components for the same nominal current, but for the moment, it works.
